Oh my goodness! I just learned this week how to use forms to collect survey results in Vision6! I told you there’d be more “new” features when I shared the Vision6 Features I didn’t know about even though I was a long-term user.
We all know it’s important to keep a finger on the pulse of your customers, and market in general, and that surveys are a great way to do this. Whether you’re collecting customer feedback, gauging loyalty, or understanding buying habits, survey forms in Vision6 make it easy.
So let’s take a look at how we do it.
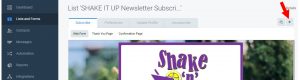
Create a new list and web form, or add a web form to a list
You will need to either create a new list for the webform or add a form to an existing list.
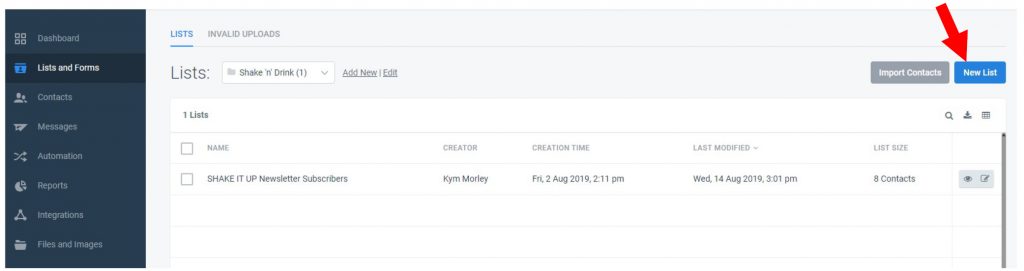
If you’re on the Pro-Marketer or Business plans you can add as many forms as you want to a list – so you can survey to your heart’s content!
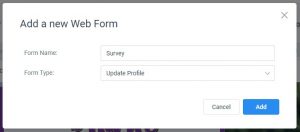
Change the Form Type to Update Profile
Give the new web form a name and change the Form Type to Update Profile. Or if you have created a new list, make sure you are using the Update Profile option.

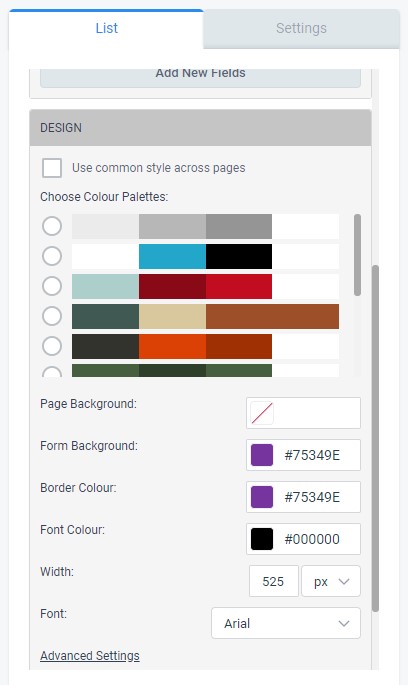
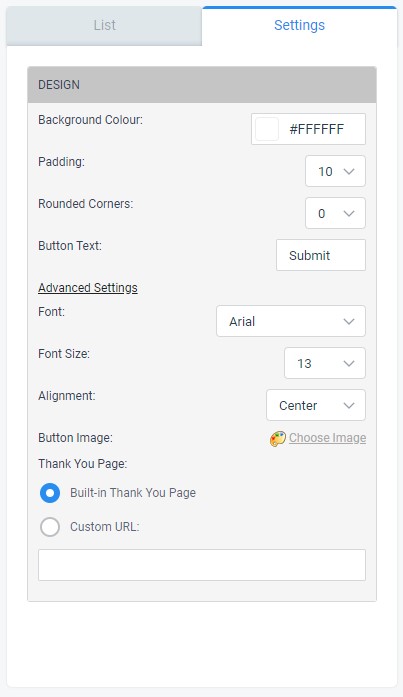
Design the Form
Change the color, background image, or spacing and more of the form using the design features to make it look how you want.
Update the Fields to your Questions
Making sure you are working in the Update Profile tab, hide or add fields so your form displays the questions you want to ask.
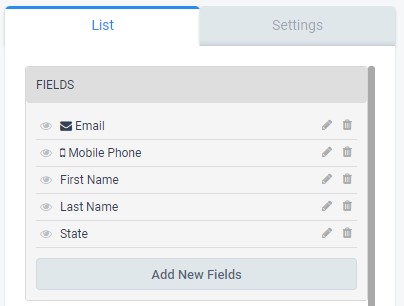
Hide the First Name and Email field, as you won’t need these, and then get to adding your questions about what you want to know using the Add New Fields button.
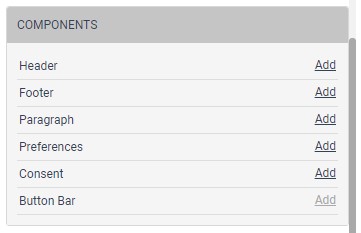
Entering your questions through the form fields
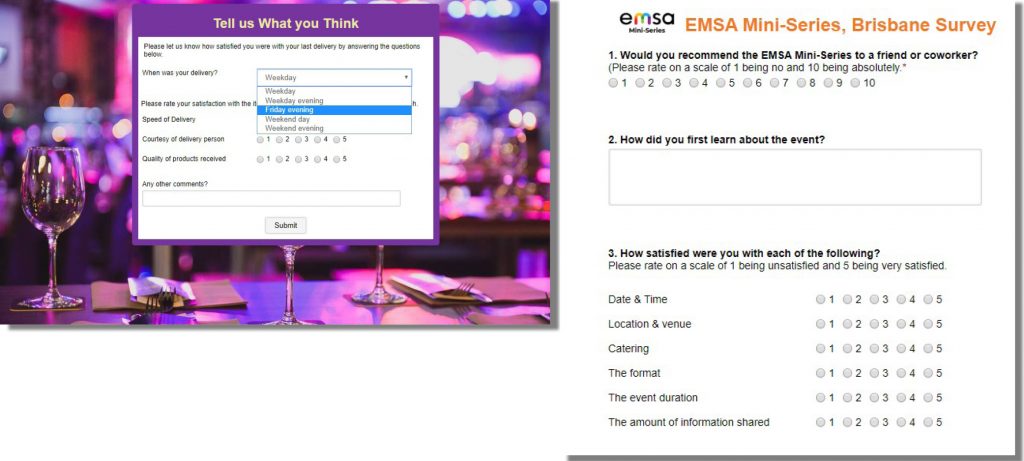
The Vision6 range of form fields has just the one you need. Use a dropdown box to collect simple, one-selection information. Allow users to give open-ended feedback with text or comment fields. Or create a satisfaction matrix with paragraphs and radio buttons.
Let’s have a look at creating a satisfaction matrix
We start by adding a paragraph component with your heading copy for example, “Please rate your satisfaction on the items below on a scale of 1 being low and 5 being high”.
Then add a radio button field with the Field Name being the item and the radio values being 1 to 5.
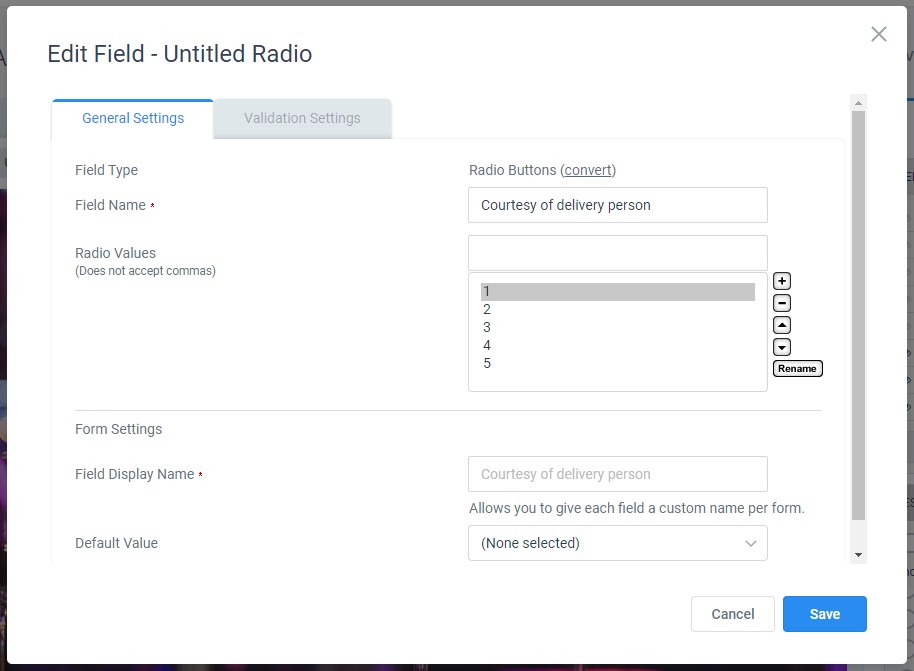
Bonus Hack: Add all of the radio values at once by listing them in the edit box separated by commas and then the add button. (Magic!)
Then edit the Design of the radio button field to have 5 items per row.
Now you can play with the label width (under Advanced Settings) and padding in the Design Settings to make the matrix look how you want.
Keep going until all of your questions are included in the form.
Make sure you Update the Thank You Page
The Thank You Page will be where people are directed when they submit the survey, so make sure it is updated and styled to match your survey.
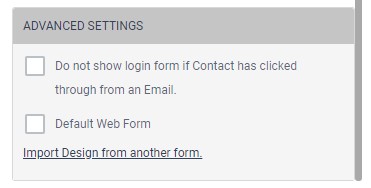
Bonus Hack: An easy way to do this is to click Import Design from another form under the Advanced Settings tab in Lists.
If you would like to redirect people to a page on your website after completing the survey (maybe you already have a beautiful, catch-all thank you page) you can do this by clicking the Submit button to edit it, and going to Settings. Then change the Thank You Page to Custom URL and paste in the URL.
Turn Off Login Form
To make sure that those completing your survey don’t need to login, go to the Advanced Settings and check Do not show login form if Contact has clicked through from an Email.
Make sure you save as you go, and you can check how your survey form in Vision6 looks at any time with the View Form button at the top.
When you’re happy with your survey and ready to send it out, simply include it in your email by creating your message, and at the link to your survey insert the form by adding a link, selecting Web Forms, and finding your form from the list dropdown.

When your survey results start rolling in, you’ll be able to see them through the contact area. Just make sure that you select the list that contains your survey and change the table settings to show the columns from your survey. Or download the results to manipulate them in excel.

There you have it – a technique to survey your subscribers right through your email and SMS marketing platform!
New to Vision6? Create your free, fully-featured trial account and take it for a test drive!